
Good rowing technique has four phases: the catch, the drive, the finish and the recovery. The power comes from your legs first, then your hips, then your arms. Get set up first: a grip about shoulder-width, straps over the ball of the foot and the damper around 3 to 6. Then row hard on the pull and stay relaxed on the return.
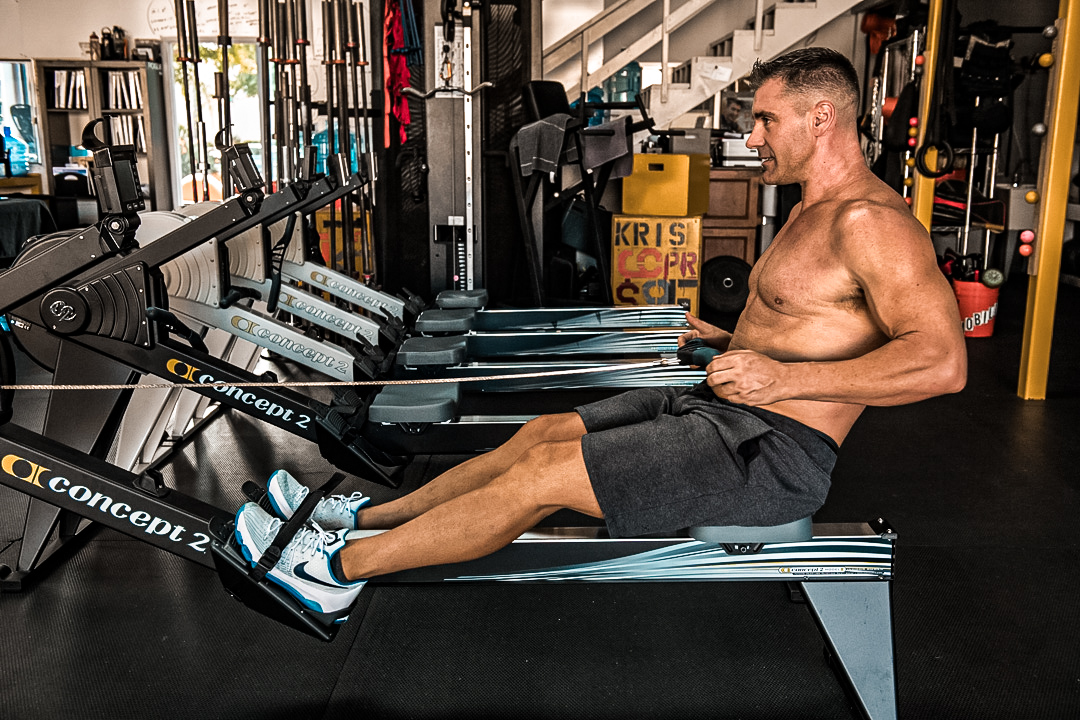
Indoor rowing is one of my favorite tools for athletic development, and it’s a staple in my San Diego training studio. It’s safe, it works, and it suits anyone from a beginner to an elite athlete. So here’s my complete guide to setting up and rowing well on a Concept2.
Why is indoor rowing worth learning?
Rowing is a coordinated, full-body movement that builds power, stamina and endurance all at once. It hits the posterior chain hard (your glutes, hamstrings and back), which supports the foundational lifts. It’s also a great pulling exercise to balance pressing work like push presses and push-ups. Better yet, rowing mimics the opening and closing of the hips you use in Olympic lifts like the clean and snatch. And because it’s low-impact, it’s easy on the joints and useful for active recovery. Still, don’t underestimate it. Good rowing technique takes both strength and endurance.
How should you set up the rower?
Hand position
The Concept2 handle angles down slightly for comfort. So take a grip about shoulder-width apart, closer to the ends of the handle. That keeps your hands and arms in line with your shoulders and lets your elbows stay close to your sides as you pull to your chest. Grip firmly as you pull, then relax your hands as you extend your arms.
Foot position
The heel cups, or foot stretchers, adjust from 1 to 5. Set them so the strap crosses the ball of your foot, usually across the bottom lace of a laced shoe. In minimalist shoes, you might want your feet a little higher so they don’t slide down. Similarly, if you’re less flexible or carry more weight around your midsection, a higher setting may feel better. Then tighten the straps snugly, but leave enough room to drive through your heels.
The damper
The damper sits on the right side of the flywheel housing and goes from 1 to 10. Contrary to popular belief, it doesn’t set the resistance. Instead, it simulates the size of the boat, which shows up as your drag factor. For example, a setting of 10 is like a big, heavy rowboat: slow to get moving but with lots of momentum. A setting of 4 or 5 feels more like a sleek racing shell. Higher settings let more air into the flywheel, while lower settings let in less.
Just as important, a higher damper doesn’t mean a harder or better workout. In fact, high settings often wear out your muscles before you get the full cardio benefit. That’s why I usually recommend a damper between 3 and 6 for most people, no matter their size or fitness.
What is the best damper setting and drag factor?
It depends mostly on your bodyweight and how far you’re rowing. Save very high settings, like 10 (or 8 for many women), for short sprints under about 150 meters, and only if you’ve practiced the stroke for a long time. For pieces of 500 meters or more, here’s a simple starting guide:
| Bodyweight | Damper setting | Suggested drag factor |
|---|---|---|
| 250 lbs | 6 to 7 | 139 |
| 200 lbs | 5 to 6 | 132 |
| 175 lbs | 4 to 6 | 125 |
| 150 lbs | 3 to 4 | 120 |
| 125 lbs | 2 to 3 | 114 |
Every machine feels a little different, so check the actual drag factor. On the monitor, go to Options, then More Options, then Drag Factor. Row at least 10 strokes, read the number, and adjust the damper until you hit your target.
What are the 4 phases of good rowing technique?
- The catch. Grip the handle evenly, slide forward with knees bent, shins close to vertical and arms fully extended.
- The drive. Push through your heels to straighten your legs. Keep your torso leaning slightly forward, at about 11 o’clock, and your arms long.
- The finish. As your legs straighten, open your hips so your torso leans back to about 1 o’clock, then pull the handle to your lower chest.
- The recovery. Reverse the order: extend your arms, hinge your torso forward from the hips, then bend your knees and slide back to the catch.
The whole time, keep your chest up and shoulders back, and move the handle in a straight line. The stroke should be smooth and continuous. As I like to say: go hard on the pull, and go yoga on the return.
What rowing technique mistakes should you avoid?
- Pulling with the arms first. Legs drive, then hips, then arms.
- Rushing the recovery. A relaxed return sets up a stronger next stroke.
- Rounding the back. Hinge from the hips and keep your chest proud.
- Setting the damper at 10. Heavier isn’t better for most workouts.
- Stroke rate too high. More strokes per minute with less power wastes energy.
How do you read the Concept2 monitor?
Press Menu or just start rowing to turn on the display. Then choose Just Row, or Select a Workout for preset pieces like 2000 or 500 meters. The top right shows strokes per minute; for most steady rowing, aim for about 24 to 30. The middle shows your average pace per 500 meters. Over the months, tracking your 500- and 2000-meter times is a great way to see your progress.
Also check the force curve display, which graphs the force of each stroke. Ideally, it looks like a smooth hill. If it looks like the letter M, smooth out the handoff from legs to back to arms. But if you only see a steep drop, you’re exploding at the catch and fading, so apply force more evenly. To find it, press Change Display until the graph appears.
Can a personal trainer help your rowing technique in San Diego?
Absolutely. Rowing is a natural motion, but great rowing technique takes practice: good posture, well-timed leg, trunk and arm movement, and endurance. A coach can spot timing errors in a few strokes and fix them fast. I’m a big believer in rowing, and I coach it with clients in my private Bay Park / Morena studio. See also the Rowvember rowing challenge, how to warm up and my rates. For weekly targets, the CDC recommends 150 minutes of moderate activity a week, and rowing is an easy way to get there.
Want your stroke coached? Text Chris at (619) 840-9099 for a free consultation.
Frequently Asked Questions
Have a question that isn’t covered here? See the full personal training FAQ.
What is the correct rowing technique on a rowing machine?
Push with your legs first, then swing your torso back from the hips, then pull the handle to your lower chest. On the return, reverse the order: arms, torso, then legs. Keep your back straight, chest up and the handle moving in a straight line.
What damper setting should I use on a Concept2?
Most people do best between 3 and 6. The damper changes how the stroke feels, not how hard it is, and high settings can tire your muscles before your heart and lungs get a good workout. Also, check the drag factor on the monitor so you stay consistent from machine to machine.
What stroke rate should I row at?
For steady rowing, about 24 to 30 strokes per minute works well for most people. So focus on powerful, controlled strokes instead of a high rate. Sprints may go higher, while easy recovery rows can be lower.
Is rowing good for beginners?
Yes. Rowing is low-impact, works your whole body and can be done at any intensity. Beginners should learn good rowing technique at an easy pace first, then build time and intensity gradually.
Chris Keith has over 30 years of personal training in San Diego (since 1995) and was voted Best Personal Trainer by San Diego Magazine. He trains clients one-on-one at his private studio in Bay Park / Morena. Learn more about Chris or contact Chris to get started.